Overview
Remove a basic door handle and install a compatible replacement.
Objective
Complete the task safely and confidently by preparing first, following the steps in order and checking the result when finished.
What You Need
- Replacement handle set
- Screwdriver
- Tape measure if needed
Before You Start
Gather everything you need and make sure the work area is suitable. Read product, appliance or manufacturer instructions where they apply, and do not continue if the task is outside your experience or cannot be done safely.
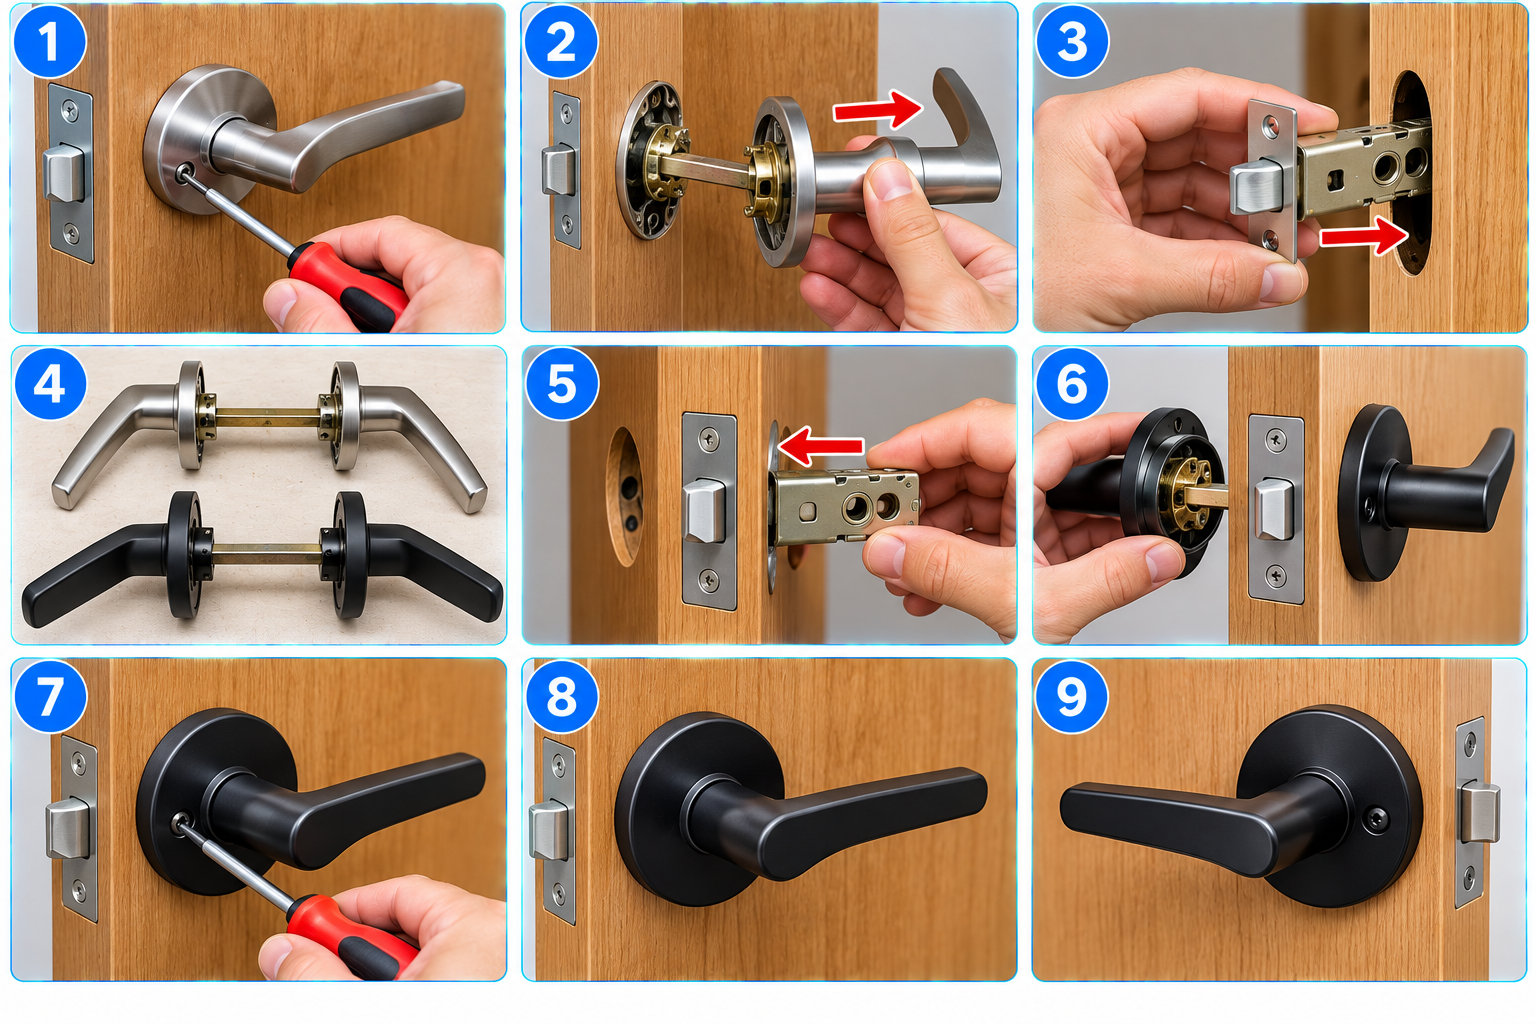
How to Do It
- Open and support the door.
- Remove the handle fixing screws.
- Separate the old handles carefully.
- Check the latch and spindle arrangement.
- Fit the replacement components in the correct orientation.
- Tighten the screws evenly and test the handle and latch.
Check Your Work
When finished, check that the result is secure, clean and working as expected. Put tools and materials away safely and clean the work area.
Useful Tips
Choose a replacement that matches the existing door thickness and latch arrangement.
Common Mistakes
- Starting before gathering the correct tools or materials.
- Rushing steps that need careful positioning, measuring or checking.
- Ignoring product instructions, care labels or manufacturer guidance.
- Continuing when the task becomes unsafe or requires specialist knowledge.
Important Notes
Use this guide as a general everyday overview. Follow applicable manufacturer instructions, local requirements and professional advice for the specific equipment or situation you are dealing with.
FAQ
What if my equipment or situation looks different?
Stop and check the relevant instructions before continuing. Designs and procedures can vary.
When should I get professional help?
Get qualified help whenever the task involves a hazard, damage, specialist equipment or work you are not confident can be completed safely.